Revit clash detection: how to identify and resolve clashes in Revit
See how Revizto fits your workflow
Revit has a built-in Interference Check tool that finds geometric overlaps between two sets of elements, either within the current model or against a linked model. It works well for hard clashes and quick checks during design, with results shown in an Interference Report you can step through, refresh and export as HTML. It has clear limits: it only detects intersections (clearances need workarounds), it excludes MEP fabrication parts and detailed steel elements, it keeps only the last report, and it struggles with very large models. Larger projects typically export NWC files to Navisworks Manage and run Clash Detective, or use a dedicated coordination platform. Best practice is to agree a clash matrix and tolerances early, limit each run to the relevant categories or worksets, check often in phases, assign owners to each issue, and rerun checks after fixes. Revit 2027 (April 2026) adds integrated Issues synced with Forma Data Management for continuous coordination.
The clash detection process is one of the more important elements of a modern BIM system, making it possible to detect and resolve various clearance issues in the design phase. As an undisputed industry leader, Revit has a built-in clash detection capability, but it is not all-powerful. Our goal for this article is to explain its limitations and go over the exact steps of how the process is conducted. The complex world of building information modeling entails a lot of important elements and moving parts in order for everything to operate as intended. This complex context means that coordination between different building systems is now more important than it has ever been, making it a significant challenge for different design teams.
The complex world of building information modeling entails a lot of important elements and moving parts in order for everything to operate as intended. This complex context means that coordination between different building systems is now more important than it has ever been, making it a significant challenge for different design teams.
Clash detection bears mentioning here. It is a process of identifying spatial conflicts between building elements in the design phase, making it an essential part of any modern BIM workflow. Autodesk Revit’s prominent position on the market means that it has powerful native clash detection capabilities, leading to thousands of dollars being saved on schedule delays and field changes.
Finding collisions between pipes and beams is not the only capability of Revit’s clash detection tools, however: they also represent a fundamental shift in the way design teams can communicate and collaborate with other project participants. When used properly, these tools can transform the classic design review process into a proactive conflict prevention environment that does not have to wait for issues to happen to start resolving them.
Our goal in this article is to not only explore the process of Revit clash detection but also to try and provide context to these features, including their advantages, shortcomings, and all the different ways they can improve project outcomes.
Clash detection in Revit
Clash detection in Revit is a systematic process capable of identifying spatial conflicts between building elements in the same digital model. The ability to visualize and resolve conflicts and issues in a 3D environment makes Revit vastly superior to traditional 2D drafting capabilities, which could only deal with issues in the construction phase. When components from different disciplines occupy the same space, the software can detect it automatically and notify the user accordingly to take the appropriate mitigation steps.
Revit’s approach to clash detection is centered around its Interference Check tool, which is much more tightly integrated into the modeling environment than any standalone clash detection software. It operates from the same platform where designers create and modify their models, making it a lot easier to address conflicts in real-time as the design evolves.
This integrated approach creates a more fluid workflow between detection and resolution, allowing for both comprehensive analysis of the entire model and targeted checks between specific systems.
How does clash detection work in Autodesk Revit?
Revit’s clash detection capabilities operate on the principle of the geometric comparison between linked files or selected model categories. When the process is initiated, the software performs an analysis of the 3D-boundaries of each element selected to identify instances where these elements might overlap.
The parametric nature of Revit also plays into this process, with each model element carrying an abundance of useful information in addition to its visual representation. This way, the system can help Revit see the distinction between intentional and unintentional connections or conflicts (for example, a pipe being connected to a fixture might be flagged as a clash, even though it is technically not an issue at all).
Revit’s underlying algorithm conducts what is, essentially, a Boolean intersection operation between different element sets. Users can even define the categories of elements that should be checked against each other, such as plumbing systems against electrical frameworks, structural components against mechanical elements, and so on.
When the operation is complete, Revit generates a report of the clashes that have been found. By default the interferences are grouped by the first and second category you selected (Category 1 and Category 2), and you can reverse that grouping. If no interferences are found, a dialog tells you so.
In addition to simple detection, the Interference Report lets designers select a conflicting element and click Show to jump to it in the current view, fix the elements while the report stays open, and click Refresh to recheck the listed conflicts. This keeps detection and resolution in the same environment without time-consuming exporting and importing. Refresh rechecks only the interferences in the current report, and Show Last Report reopens the most recent report without rerunning the check; Revit keeps only that last report, so tracking over time needs the Issues workflow below or a coordination platform.
Primary advantages of Revit in clash detection
Revit’s clash detection delivers substantial advantages over traditional coordination methods, and it can even be beneficial when compared with a lot of standalone clash detection software. These benefits often extend beyond basic error detection, bringing in improved workflow efficiency, better build quality, and more streamlined project timelines. Many of these benefits are listed below.
Conflict resolution in real-time
Real-time conflict resolution helps design teams address issues as they arise instead of waiting for dedicated coordination sessions to do so. The two-way feedback system makes it easier to retroactively apply any changes to the entire model. For example, if the architect adjusts the height of a ceiling, the effects of this change on other systems are propagated immediately, highlighting potential issues within a short time span.
Reduction in coordination overhead
The reduction of coordination overhead is a result of the clash detection feature being kept within the primary design environment. Project teams can avoid various time-consuming processes of exporting models, running external checks, documenting issues, and only then returning to Revit for corrections (while still maintaining version control across platforms).
Better design quality
Design quality improvements appear naturally once designers become aware of the various cross-disciplinary applications of such a high-level clash detection process. The feedback loop this process creates can foster a much more holistic approach to different design decisions. In this way, professionals may be much more inclined to consider spatial constraints from other disciplines in their designs from the get-go.
Lower construction costs
The decrease in construction costs stems directly from being able to identify conflicts before the on-site construction stage. Clash resolution in the design phase prevents expensive change orders, along with schedule delays, material waste, and all the additional labor costs associated with problem-solving processes on-site.
Improved client confidence
Client confidence is enhanced when teams can demonstrate thorough coordination results during design reviews. The ability to present a clash-free model is tangible evidence of quality control processes, which tends to reduce client concerns about various constructability issues later on.
Streamlined documentation
Documentation streamlining, on the other hand, is a result of clash-free models being able to produce more accurate schedules and drawings. When building systems are properly coordinated within the same model, the resulting construction documentation can reflect that level of precision, reducing clarification requests and RFIs during actual construction processes.
Major types of clash in Autodesk Revit software
Implementing an effective clash detection strategy using a tool as powerful as Revit necessitates a certain level of knowledge when it comes to clashes. While it is true that the software itself does not explicitly tag the type of a clash within its interface, it is still important knowledge for the development of appropriate approaches to resolution and the prioritization of issues.
Hard clashes are the most straightforward category. They are physical intersections between two solid objects in the same space. Revit excels at identifying these violations with Interference Check, highlighting them using clear visual indicators. Hard clashes require immediate resolution in most cases, since they represent physical impossibilities that would absolutely prevent the completion of construction processes.
Soft clashes are violations of various clearance requirements or accessibility areas, not direct physical intersections. Detecting soft clashes in Revit is significantly harder than hard clashes, necessitating the creation of clearance zones as separate elements of the model (or the use of room objects with specific parameters). These clashes are not as obvious to the naked eye as hard ones, but their problematic potential is roughly on the same level when it comes to both building and maintenance processes.
Workflow clashes are also sometimes referred to as 4D clashes. They are related to temporal conflicts and construction sequencing (crane swing radiuses overlapping existing structures, temporary structures interfering with installation processes, etc.). Such issues do not arise from permanent spatial intersections, but rather from the process of building. Addressing such clashes often requires deeper integration with construction scheduling software or specialized 4D BIM tools, both of which go beyond the native capabilities of Revit. These workflows are one of the biggest use cases for integrating with Navisworks, other Autodesk software that will be important later.
Noteworthy limitations of the native clash detection capabilities in Revit
Even though Revit does offer valuable clash detection capabilities, it also has a number of inherent limitations that potential users should be aware of. These constraints also lead to the supplementation of Revit with specialized software for more advanced or case-specific tasks. The biggest examples of such disadvantages are:
- Limited reporting capabilities, which can restrict teams when it comes to documenting and tracking clashes over time. Revit offers only a basic interference report capability without strong categorization or filtering, which tends to make systematic clash management more difficult in complex projects where hundreds of conflicts are the norm.
- A certain degree of performance degradation is to be expected with clash detection efforts on complex and multifaceted models. Although Revit does handle most large-scale projects well, its processing capabilities are still not limitless even with the most up-to-date hardware, resulting in slower check times and even occasional stability issues which may cause workflow interruptions or reductions in team productivity.
- The inadequacy of the clearance checking capabilities that are built into Revit can hamper the ability to identify and resolve soft clashes. Teams that need such capabilities must look into custom families or workarounds to properly detect such spatial requirements, since there is no native support for such functionality.
- Challenges with cross-disciplinary coordination also emerge from Revit’s file-based workflows when there is a need to maintain separate models in multiple disciplines. It is true that there is functionality for linked models to be checked against each other, but the process is still far too cumbersome in comparison with specialized platforms, necessitating careful file management and maybe even additional steps for maintaining the accuracy of clash results.
- Interference Check does not include MEP fabrication parts or detailed steel modeling elements; Autodesk recommends using Navisworks for those.
What is new for coordination in Revit 2027
Revit 2027 was released in April 2026, with Revit 2027.1 following in June 2026. For coordination, the biggest change is that Issues for Revit is no longer an optional extension: it is part of the core product, so teams can create, view and resolve issues directly inside Revit, synchronized with Forma Data Management. Revit 2027 also adds Model Analytics, which gives visibility into model health, performance and potential risks, and Revit subscriptions now include Forma Data Management Essentials.
Revit can also bring a coordination model from Navisworks or Forma Data Management into the project, so designers can check their work against teams that use other software.
Autodesk’s cloud coordination products have been renamed under the Forma brand: Autodesk Docs is now Forma Data Management, and BIM Collaborate Pro is now Forma Design Collaboration.
The native Interference Check itself is still found under Collaborate > Coordinate in the Revit 2027 documentation and still checks geometric intersections only, so the limitations above remain.
Integration of Navisworks for advanced clash detection
When projects necessitate more complex coordination capabilities than Revit offers, the obvious solution is to look into third-party options. Navisworks is often seen as the preferable option, considering that it is also Autodesk software and is deeply integrated with Revit from the get-go. Navisworks is a purpose-built coordination platform that uses a streamlined export process capable of optimizing file size for performance and preserving model fidelity at the same time. Note that Clash Detective is included only in Navisworks Manage; Navisworks Simulate does not have it.
This deep integration allows for the creation of a complementary system in which design occurs within Revit while comprehensive clash detection and resolution tracking capabilities are offloaded to a specialized Navisworks environment. The latter operates on a much deeper level, with clash detection issues using the Clash Detective feature. This feature offers robust reporting capabilities, complex filtering mechanisms, and granular control over detection parameters.
Teams can use Navisworks to establish clearance-based rules, implement systematic resolution workflows, and even create tiered clash priorities when necessary. It is also a lot more powerful when it comes to handling large and complex models, something that Revit’s clash detection capabilities struggle with.
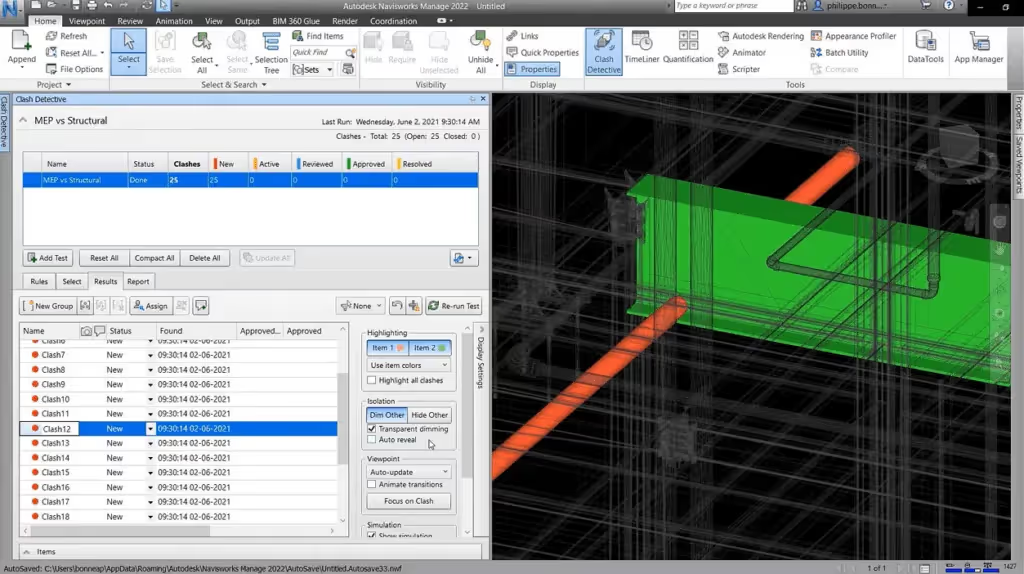
A typical workflow between Revit and Navisworks is reliant on three important elements:
- Regular model exports at predetermined project milestones.
- Centralized clash detection sessions in Navisworks.
- Targeted resolution efforts in the original Revit model.
This cycle is somewhat more complex than it would be with Revit’s capabilities alone, but the efficiency gains Navisworks provides often outweigh this disadvantage for large and complex projects. There are also many businesses that prefer to use a hybrid approach, handling basic clash detection tasks with Revit’s own capabilities while reserving more complex processes, such as multidisciplinary coordination sessions, for Navisworks, where it shines the most.
Step-by-step guide: clash detection analysis in Revit
As we have mentioned, many advanced coordination efforts require integration with Navisworks and an abundance of case-specific steps which cannot reasonably be replicated in one place. At the same time, Revit’s native interference checking capabilities are still more than enough for the most common clash detection scenarios. This basic clash detection process takes place step-by-step:
- Preparation process
Make sure that all relevant linked models are loaded and positioned properly.
You can navigate to the Manage tab and verify that the links between the models are visible in all views.
If the project is sufficiently large, worksets can be used to control the specific portions of the model that are going to be checked to avoid spending time on checking irrelevant areas.
- Accessing the Interference Check tool
Next, choose the Collaborate tab on the ribbon of the interface.
Once selected, locating and moving to the “Coordinate” panel is the recommended step, followed by opening the “Interference Check” drop-down and choosing “Run Interference Check”.
The Interference Check tool can be initiated in a separate dialog box that helps users configure various detection parameters.
In the current Revit documentation the tool is listed only under the Collaborate tab. The same drop-down also contains “Show Last Report”, which reopens the previous report without rerunning the check.
- Defining which elements to check
The Interference Check dialog box is where the element sets for the check are specified: exactly two sets of elements that are checked against each other.
On the left side of the dialog, choose a value from the first “Categories from” drop-down, for example Current Project or the name of a linked Revit model (a linked model must be selected by its name).
Then tick the categories you want to check; the All, None and Invert buttons change the selection quickly.
On the right side of the dialog, repeat the process for the second set, which can be a current selection of elements, the current project or a linked Revit model.
Checking too many categories at once is not recommended due to the possibility of an overwhelmingly confusing test result.
- Limiting the scope of the check
Before opening the dialog you can select elements in a view; the dialog then lists only the categories of those elements, which keeps the results focused.
To reduce processing time, limit the number of categories or elements: checking every category against every other category in a large model can take a long time and is not recommended.
- Running the interference check
Once all the categories are selected, you can click “OK” to run the check.
The process may take anywhere from seconds to minutes depending on the number of elements chosen and the general complexity of your model.
A progress bar should be displayed within Revit’s interface for the duration of the process.
- Reviewing the report made by the interference tool
Once the processing is complete, if interferences are found Revit displays the Interference Report, which lists all elements that are in conflict with one another; if none are found, a dialog tells you so.
The report groups conflicts by category: by default Category 1 (left) and Category 2 (right), and you can switch the grouping to Category 2, Category 1.
Every row in the report represents a distinct spatial conflict that should be addressed before proceeding.
- Navigating toward and resolving clashes
Clash navigation is relatively easy in these reports. All you have to do is select any clash in the report and click the “Show” button for Revit to zoom in on the conflict location in 3D.
It also highlights the conflicting elements in the process, helping users assess the nature of each clash in a convenient manner.
Once the clash has been reviewed, you are free to make the necessary adjustments to resolve each issue, including resizing components, moving elements, adding coordination clearances, etc.
After fixing a conflict, click Refresh in the Interference Report; resolved items drop off the list. Refresh rechecks only the interferences already in the report and does not rerun the whole check.
- Exporting and documenting the results
Creating a permanent record of the clashes detected is possible using the “Export” button in the interface.
This way, you can generate an HTML file, creating detailed documentation of a specific clash detection process for future coordination meetings.
It can also serve as a checklist for tracking the progress of resolution in the future. However, more complex reporting tasks must rely on specialized solutions such as Navisworks.
To continue in Navisworks, export the Revit model (not the interference report) as an NWC file, using Add-ins > External Tools > Navisworks or File > Export > NWC once the free NWC Export Utility is installed; clash tests are then run with Clash Detective in Navisworks Manage.
Once the conflicts have been resolved, it is highly recommended to run the interference check process again (Refresh alone rechecks only the conflicts already listed) in order to verify whether your solutions to existing issues have created new clashes in the model or not. Effective clash detection is almost never a one-time effort, and it is best to approach Revit clash detection as an iterative workflow that should be continued throughout the entire design development stage.
Best practices for clash detection processes in Autodesk Revit
A strategic approach to clash detection can have a profound positive impact on general efficiency and project outcomes. There are also a few best practices that represent lessons learned from various industry leaders refining their coordination workflows over the years, some of which are presented below.
It is highly recommended to establish clear clash detection protocols early on, making sure to define which elements must be checked against each other and at which project milestones. Setting realistic tolerance thresholds also applies here: they should be specific to your construction methodology and project type. Incorrect tolerance thresholds may allow some important issues to slip through if the threshold is too loose, and some time could be wasted on inconsequential issues if they are too tight.
Leveraging worksets and design options can help control which model content is included in clash detection runs, making it possible to check areas undergoing active development instead of wasting resources going through the entire model. A clear and detailed clash matrix with defined disciplines will prevent unnecessary processing time while ensuring that every critical element of the project is evaluated.
Standardized naming conventions for all model elements can greatly improve communication when it comes to conflict detection and resolution. Even better, a dedicated clash resolution workflow should be developed to set clear responsibilities and time frames to make sure that issues do not remain unaddressed as the model continues its development process.
Regular coordination meetings should be conducted with a focus on reviewing the results of clash detection processes, bringing together representatives from various disciplines to make collaborative decisions when it comes to issue resolution. Systematic documentation of any clash resolution efforts also creates an audit trail to demonstrate the company’s due diligence and offer valuable reference information for future encounters with similar conflicts.
Targeted, frequent checks can also be useful in some situations. They take a lot less time and resources than model-wide scans while being able to catch issues early on when they are easier to resolve. Phased implementation can do wonders here, with major systems being checked early on with a gradual increase in the level of detail as the design develops. This way, teams are a lot less likely to be overwhelmed with minor clashes while running the risk of missing out on bigger ones.
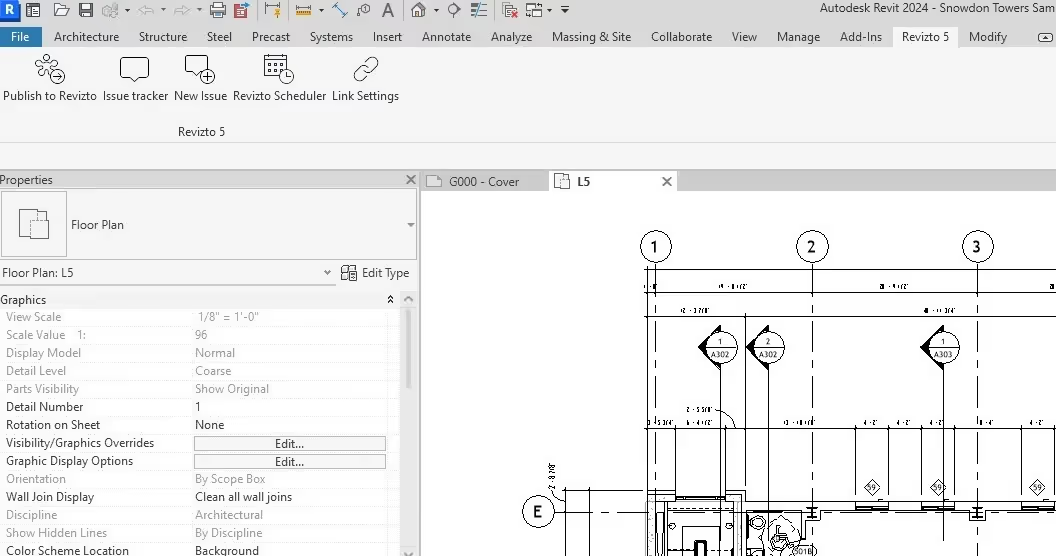
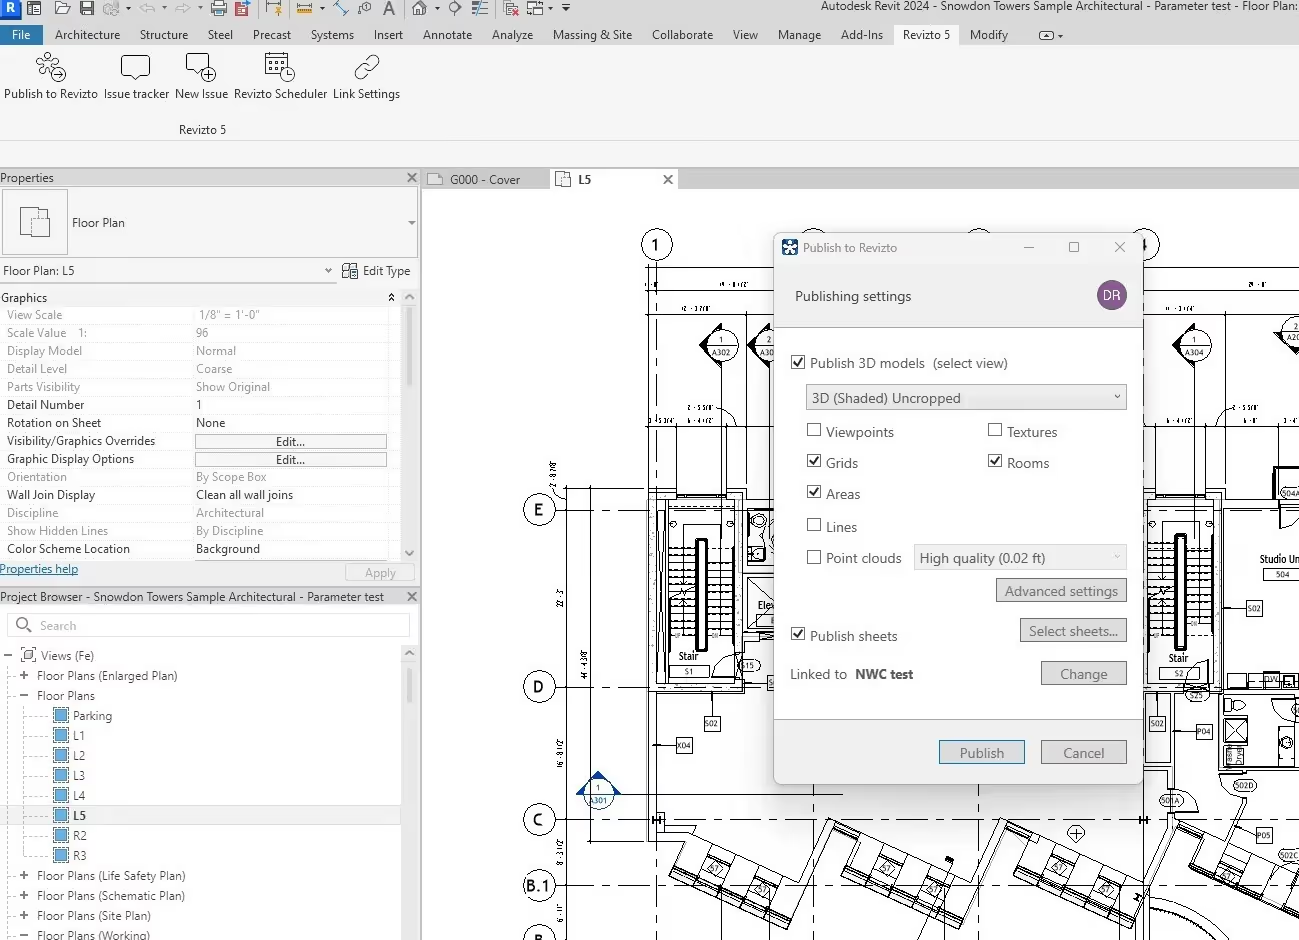
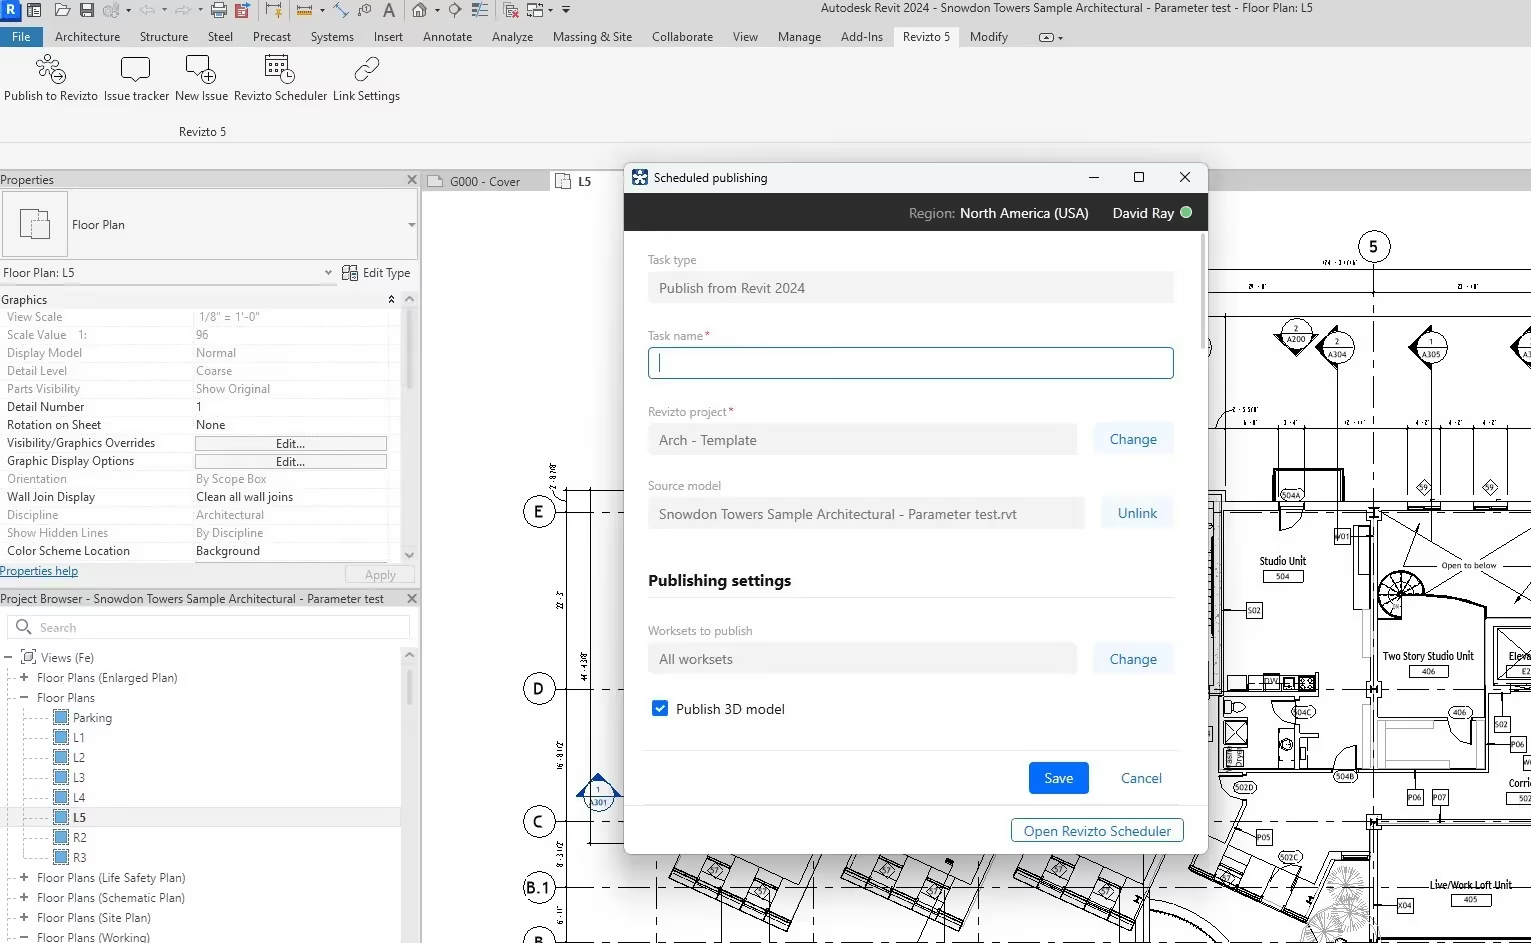
Here’s an example of how the Revizto extension can be used to perform clash detection operations on a Revit model and publish it to Revizto’s own software (manually or automatically).
Conclusion
Revit’s clash detection ability is an important part of modern BIM coordination efforts, considering the sheer market share of the software. It offers design teams the ability to find and resolve spatial conflicts before they can be translated into issues in the field, which are a lot more expensive to resolve. Even though the built-in clash detection capabilities of Revit have their own limitations (especially in larger and more complex projects), they remain a great entry point for coordination and are seamlessly integrated with the design process.
Then again, Revit can also be supplemented with specialized tools such as Navisworks, greatly improving the quality and performance of model coordination efforts and creating a solid foundation for a comprehensive clash detection strategy to improve project outcomes.
The true value of Revit clash detection goes beyond the basic location of interference. It is a fundamental process that can transform the entire design process from reactive to proactive while putting a lot more effort into collaborative efforts. As teams become more proficient with implementing clash detection processes into their workflows, clash detection evolves from a technical exercise into a powerful communication tool capable of improving cross-disciplinary coordination efforts across the board.
In an industry where coordination issues can lead to massive scheduling and financial issues, mastery over Revit’s clash detection capabilities is more than an optional skill: it is an investment in project quality and the professional reputation of the entire business, paying substantial dividends throughout the entire building lifecycle.