How to automate attribute checks in Revizto using clash automation
See how Revizto fits your workflow
Clash automation is usually used to find physical clashes between models. It can also check whether elements carry valid property values. Moritz Mombour, Associate Partner at Drees & Sommer, shows how in the Revizto webinar Automatisierte Attributprüfung (presented in German), using concrete grade in a training project as part of preparing data for automated quantity takeoff for cost calculation and tendering. This article turns that technique into steps you can follow.
Quick takeaway: Save the valid values for a property as search sets and invert them to find the invalid ones. Then create a clash test with the Clearance type and a very large clearance, comparing the invalid elements with a single reference object. Every element with an invalid value then appears as a clash, which grouping and issue automation can turn into trackable, assignable issues.
Why check attributes with clash automation?
You can check a property on a few elements by eye or with the Selection Inspector. With many properties and many elements, and with checks that repeat after every model update, manual updating becomes the bottleneck. Configuring the check once lets your team focus on setting it up, distributing tasks, and correcting data, not on processing it.
Step 1: Define valid and invalid values with search sets
Search sets save search criteria so you can repeat a search at any time. Build the check in stages so it applies only to the right elements:
- Filter by element type to isolate shell (structural) elements, using your project’s naming convention.
- Filter by material to keep only concrete elements, using the “within search set” option to search inside the previous result.
- Create a search set for each permitted value of the concrete grade parameter. Use “contains” so stray spaces before or after a value don’t cause false errors.
- Combine the valid-value search sets with OR into one set, which shows the elements with a valid grade.
- Create the inverse of that set, using NOT, to show the concrete elements without a valid grade.
In the training project, the filters narrowed 418 elements to 167 shell elements, then 145 concrete elements, of which 117 had a valid grade and 28 did not. These figures are illustrative, from a training model.
For housekeeping, prefix check-related search sets with an underscore so they sort to the top. Keep a backup folder for sets you no longer need, instead of deleting them, since they can still be referenced in other filters.
Step 2: Build the clash test with the Clearance type
The Clearance clashing type reports a clash when the minimum distance between two objects is less than the clearance value. Use it to turn invalid elements into clashes:
- One selection is the search set of elements with invalid values (selection B in the example).
- The other selection is a single reference object, called a model origin body. Keep it in a separate file that also holds the levels, grids, and zones.
- The clearance value is set extremely high (10,000 m in the example), so every element with an invalid value falls inside it and counts as a clash.
Keep the reference object in a separate file so that, when you use Switchback to jump to the authoring tool, it is never selected along with the elements you want to correct. Revizto’s Help Center notes that the search sets chosen for a clash test’s selections must be shared. Name the test descriptively, for example “concrete grade invalid.”
Step 3: Make the results readable with grouping
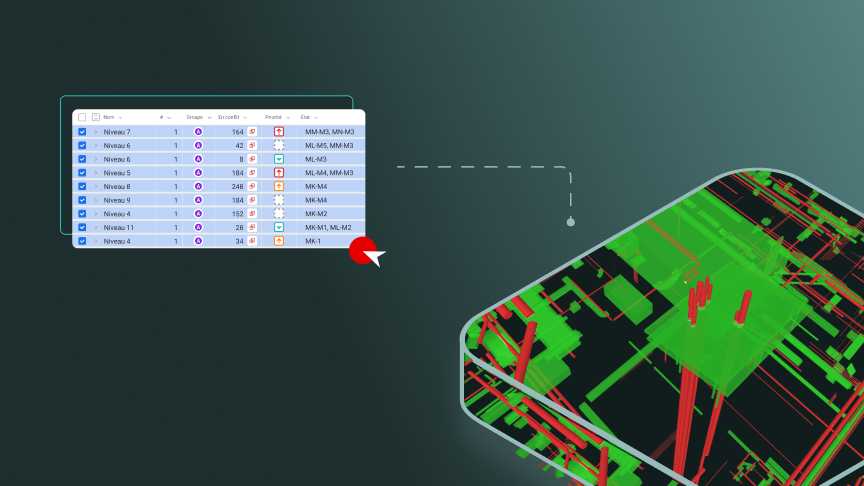
Group the clashes by properties of the invalid elements, such as the category, the load-bearing material, and the parameter name. The group names then describe the problem, such as a foundation in reinforced concrete with no value. In the training project, this produced seven groups containing the 28 individual clashes.
Set up the clash view so the results are easy to scan: a section box that covers the whole building, and an appearance template that shows mainly the concrete elements. Revizto’s Help Center describes the available grouping conditions, including grouping by a property value, in How to group clashes automatically in Revizto.
Step 4: Create issues with advanced issue automation
Advanced issue automation can create issues based on conditions using search sets. For example, a search set based on model category can check whether a clash group has at least one foundation object. If it does, the issue receives a stamp and a tag for foundations. Use the same stamp for every check, with a separate tag per category, so dashboards can filter by category.
Consider running two tests. One runs continuously to feed dashboards without creating issues. The other creates issues only when you prepare the data for a milestone. The Scheduler can run tests on a schedule, for example after a model upload.
Step 5: Correct the data and let Revizto close the issues
- Open an issue and use Switchback to jump to the element in the authoring tool, here Revit, with the affected elements already selected.
- Correct the property values at the source. In the example, the grade is controlled through key lists.
- Publish the model again, using a defined export view so the result is reproducible.
- Load the updated model in Revizto and rerun the clash tests.
In the webinar demonstration, correcting the foundations left 17 of the 28 elements, and the foundation group disappeared. The issues for the corrected elements showed as automatically closed, because corrected elements are no longer in the search set of invalid values.
How do you track progress?
Connect the live test to dashboards to monitor data quality over the course of a project. In the example, a donut chart excludes solved and closed issues and breaks open issues down by tag, showing 28 open issues before the correction and 17 after. Other dashboards in the example track concrete grade, degree of reinforcement, and exposed concrete class.
Tips
- Name tests, search sets, and groups so that results explain themselves.
- Use appearance templates to show checked results clearly, valid in green and invalid in red.
- Keep the reference object in a separate file with levels, grids, and zones.
- Use one stamp with separate tags if you want to analyze results by category in dashboards.
Ready to turn data checks into trackable issues?
Want to see how clash automation can validate your model’s property values and flag the elements that need correcting on your own projects? Talk to the Revizto team for a walkthrough tailored to your workflow, or book a demo to see Clash Automation in action. To learn how to build your own attribute checks, explore the Revizto Academy for hands-on training on search sets, clash tests, and issue automation.